As students develop a greater understanding of riding at each level, they are more likely to progress on to the next level without the constant need for revision and to go back and ‘fill in the gaps’.
The explanation ‘Just sit each time the shoulder moves back/forward/up/down does not give a student sufficient understanding of trot diagonals. Unless an instructor has a system of how to teach trot diagonals, it can be confusing for their students and anyone watching the lesson.
While I may not teach every step every time, these are the steps I regularly use (and encourage my students to use) for teaching trot diagonals.
Start with Questioning, Demonstrating and Explaining the Theory of Trot Diagonals
- Ask student to explain sequence of legs at the walk. (A. inside hind, inside fore, outside hind, outside fore)
- This can be done in slow motion, one step at a time for the student to gain the answer.
- It may be easier for students to see if you commence with a hind leg
- Many students will initially ‘guess’ the answer at this step without really looking.
- Stay on this question, give assistance until they really ‘get it’
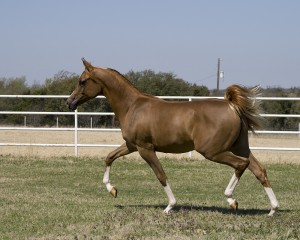
- Ask student to explain the sequence of the legs at the trot(A. inside hind and outside fore together, followed by a period of suspension, followed by outside hind and inside fore together)
- Many students already understand the diagonal pair, but this lesson may be the first time they really see it
- Make sure they can count the beats in the correct tempo
- Ask student if impulsion is created by the hind legs or the front legs (A. hind legs)
- Most will answer ‘the hind legs’
- Forthose who don’t know the answer, this lesson can be expanded into explanations of pushing and pulling
- Ask student which hind leg takes a longer stride on a circle (A. outside hind)
- This can be demonstrated by the instructor walking a small circle and exaggerating the longer stride with their outside leg
- Ask student which hind leg takes a shorter stride, therefore creating more ‘pushing’ power on a circle (A. inside hind)
- This can be demonstrated by the instructor walking a circle and exaggerating the pushing power with their inside leg
- Ask the student to ‘feel’ if it is easier to encourage their horse forward while sitting or rising. (A. sitting)
- At the halt, their horse should be held and encourage student to close eyes to develop an answer
- They can stand in the stirrups, imagine that they are going to encourage their horse forward
- Then sit in the saddle and imagine that they are going to encourage their horse forward
- Ask your student which of the horse’s hind legs should be on the ground ‘pushing’ to gain most benefit from the aids (A. outside hind)
- The instructor can walk a small circle and exaggerating the pushing power to remind them of the earlier question
- Ask if it is easier to see what the front legs are doing or to turn around and look at the hind legs (A. look at the front legs)
- The instructor can simulate riding a horse and exaggerating how difficult it is to look at the hind legs while trotting
- Ask which of front legs touches the ground at the same time the inside hind (which is creating all the energy) touches the ground (A. outside fore)
- Instructor can demonstrate the trot sequence
- Confirm that the student is going to sit when the outside front leg and inside hind leg touches the ground
- If not, repeat all or part of the above sequence
Confirm Knowledge with Exercises Leading to Trot Diagonals
- Confirm the student can recognize when the outside leg touches the ground
- If they are riding in an enclosed arena with a high wall, they should be riding on the inside track so their head is away from the wall
- The students can call our ‘now, now, now’ each time their horses outside front leg touches the ground
- Confirm the students can sit in the correct position and recognize when the outside leg touches the ground while watching the shoulder
- The student should continue to call out ‘now, now, now’ each time their horses outside front leg touches the ground
- Confirm the student can sit each time the horses outside front leg touches the ground
- Student will commence with two point jumping position and sit each beat
- The tempo is a little slow at the walk making this exercise a little difficult, so once this has been achieved the next one should be easier
- Once the rising and sitting rhythm has been established in the walk, confirm the student can maintainit in trot
- They can commence in two point seat and sit each time the outside front leg touches the ground
- On the new rein, confirm the student can recognize when the outside leg touches the ground
- If they are riding in an enclosed arena with a high wall, they should be riding on the inside track so their head is away from the wall
- The students can call our ‘now, now, now’ each time their horses outside front leg touches the ground
- On the new rein, confirm the students can sit in the correct position and recognize when the outside leg touches the ground while watching the shoulder
- The student should continue to call out ‘now, now, now’ each time their horses outside front leg touches the ground
- On the new rein, confirm the student can sit each time the horses outside front leg touches the ground
- Student will commence with two point jumping position and sit each beat
- The tempo is a little slow at the walk making this exercise a little difficult, so once this has been achieved the next one should be easier
- On the new rein confirm the rising and sitting rhythm has been established in the walk, confirm the student can maintain it in trot
- They can commence in two point jumping seat and sit each time the outside front leg touches the ground
Changing Trot Diagonals
- Before a student learns to change diagonals, they should learn the rhythm of changing at the trot
- Sit, rise, sit, sit, rise, sit, rise
- For a horse with a bumpy trotor a rider that find the previous step difficult, change the exercise to
- Sit, rise, sit, rise, rise, sit, rise
- Change rein and trot diagonal returning to the correct trot diagonal
- Changes of rein across the diagonal/ short diagonal
- Change rein and trot diagonal returning to the correct trot diagonal
- Changes of rein down the centre line/ across arena
- Change rein and trot diagonal returning to the correct trot diagonal
- Figure of eight/ serpentines
‘Feel’ exercises For Correct Trot Diagonals
Once the theory of correct trot diagonals is thoroughly understood, exercises to develop the ‘feel’ of the correct diagonals are learnt.
- From either walk, commence rising trot
- Try both diagonals and choose the most comfortable
- Once a diagonal sequence has been chosen, then the student checks they are on the correct diagonal.
- Change rein and repeat the above exercise
- From sitting trot, commence rising trot
- Try both diagonals and choose the most comfortable
- Once a diagonal sequence has been chosen, then the student checks they are on the correct diagonal.
- Change rein and repeat the exercise above
- For more difficulty
- Establish sitting trot, count 11 very quickly and then rise on the correct diagonal. (It is important that this counting is done very quickly and not in the rhythm of the trot)
- Change rein and repeat the exercise above
- As with any learning, the best way to confirm understanding is to teach it
Understanding of Trot Diagonals
If your student is going to develop a thorough understanding, they should give the correct answer at every step. If they are not able to, then it is best to encourage them to learn each step before progressing on to the next one.
There are other ways to teach diagonals and variations of these exercises, and in some circumstances I vary them myself. However this system has been developed over thousands of students of all levels and types of learning abilities and is the one most commonly used.
Remember too, that there are times with valid reasons why we may ride on the other trot diagonal. This system has been developed for riding on this diagonal and it needs to be adapted for teaching on the other diagonal.







Thank you once again for your valuable information. The step by step information is written in a way that is so easy to understand 🙂